Overview
This article provides step-by-step instructions on how to retrieve external authentication details for RC backend login using Microsoft account with OAuth2.
NOTE: This method is changed from code flow to implicit flow from 4.3 RTM.
Authentication Details for OAuth2
Part A. Register application in Azure AD
1. Go to Azure portal ➔ Azure Active Directory ➔ App registrations and click [New registration].
2. Fill in application details:
- Name: enter application name.
- Supported account types: select ‘Accounts in this organizational directory only (… only – Single tenant’.
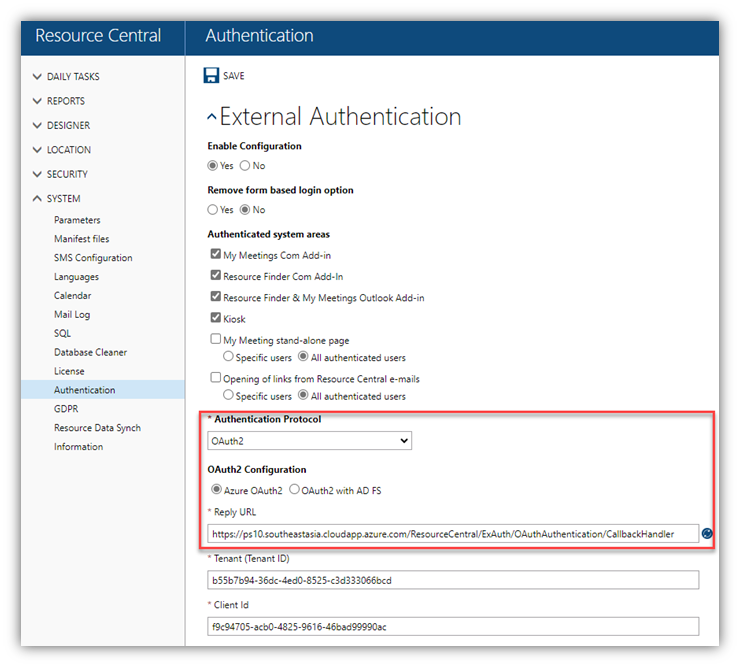
- Redirect URI: select Web platform, then enter Reply URL generated in RC backend ➔ System ➔ Authentication. (This Reply URL is automatically created when you select an ‘Authentication Protocol’ – see screenshot below)
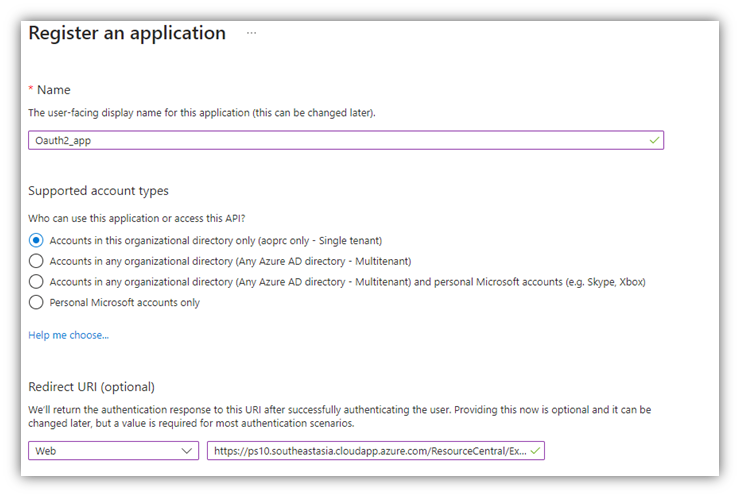
3. Click [Register] button at the bottom of the screen.
Part B. Configure details for the created Azure AD app
Client secret
Go to Azure portal ➔ Azure Active Directory ➔ App registrations. Click [All applications] then select the app that you registered in Part A to see its details.
Click [Certificates & secrets] ➔ [New client secret].
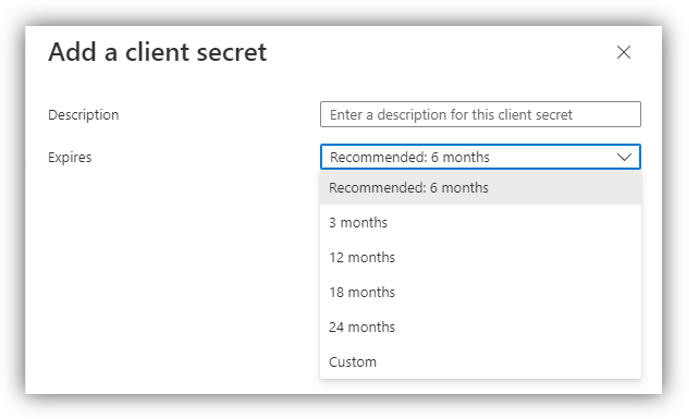
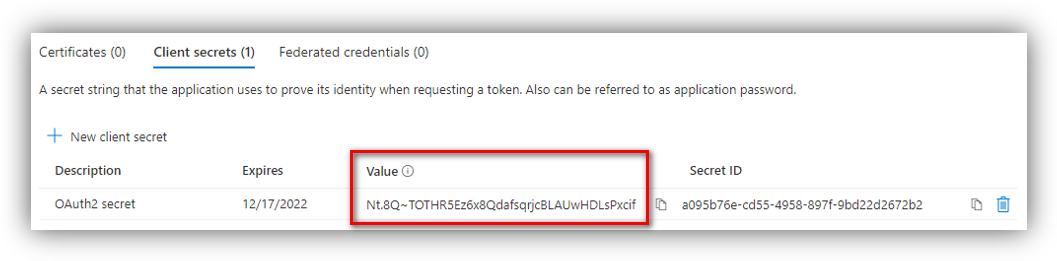
Enter Description, select Expires time, then click [Add] button. The Value and Secret ID column will be populated with Client secret and an ID:
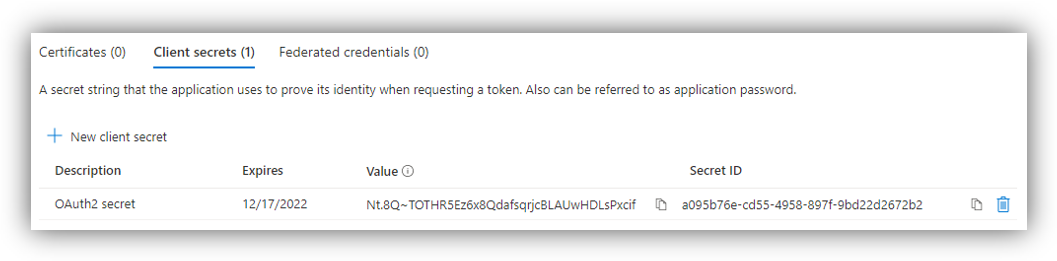
Please remember to copy client secret value because you will not be able to retrieve it after leaving this panel.
NOTE: If the Expires time has passed, you should create a new Client secret and replace Resource Central.
Application ID URI
NOTE: If the option Resource Finder & My Meetings and Outlook Add-in is chosen in Authentication configuration, you need to configure them with application ID URL.
To retrieve Application ID Url, follow these steps below:
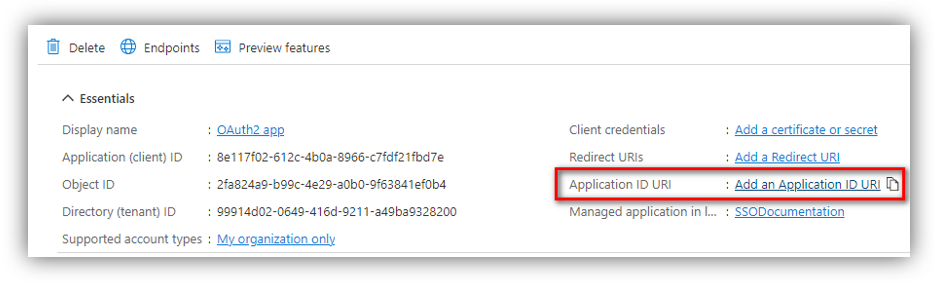
1. Go to Azure portal ➔ Azure Active Directory ➔ App registrations. Click [View all applications] then select the app that you registered in Part A to see its details. Then click [Add an Application ID URI].
2. Look for ‘Scopes defined by this API’ section, then click [Add a scope] which opens a screen on the right side. The ‘Application ID URI’ field is shown with the following format:
api://[ Application (client) ID of this app]
For example: api://8e117f02-612c-4b0a-8966-c7fdf21fbd7e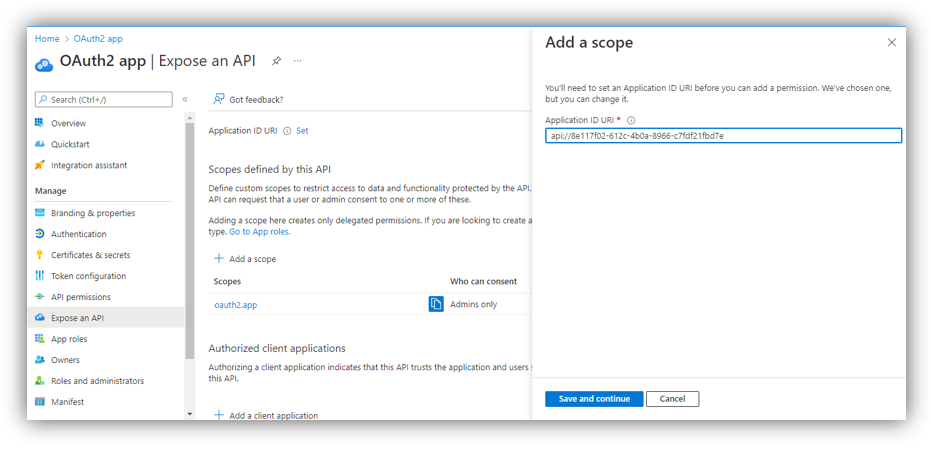
api://[RC backend URL]/[ Application (client) ID of this app]
For example: api://ps5.add-on-company.com/8e117f02-612c-4b0a-8966-c7fdf21fbd7e
After that, click [Save and continue] to proceed to the next step.
3. On ‘Add a scope’ screen (figure below), enter necessary information for the 3 mandatory fields: Scope name, Admin consent display name, and Admin consent description.
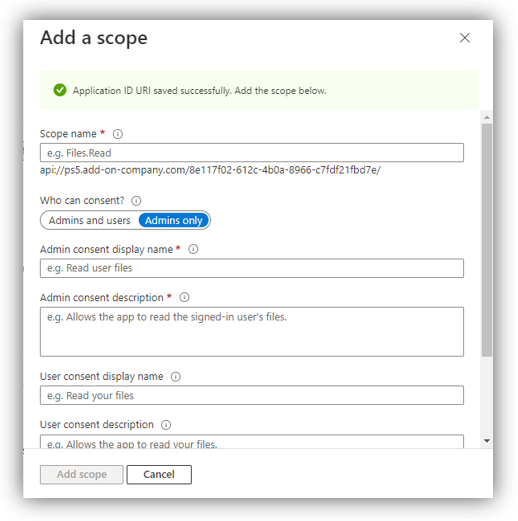
Once you are done, click [Add scope].
4. Look for ‘Authorized client applications’ section, then click [Add a client application] which opens the following screen:
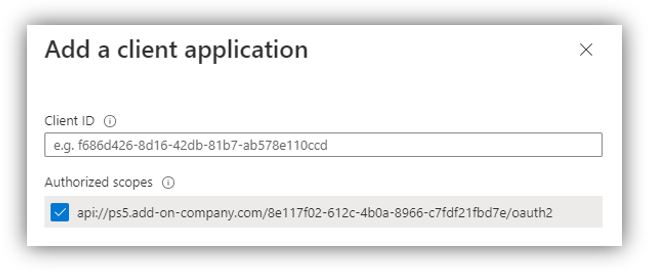
Here, select the scope(s) that you have added from step 2, then enter the ‘Client ID’ which will allow Office to access to this app.
There are 4 Client IDs that you can choose, each allows specified Office app to have access:
- For all Microsoft Office application endpoints (highly recommended): ea5a67f6-b6f3-4338-b240-c655ddc3cc8e
- For Microsoft Office (desktop app): d3590ed6-52b3-4102-aeff-aad2292ab01c
- For Office on the web: 93d53678-613d-4013-afc1-62e9e444a0a5
- For Outlook on the web: bc59ab01-8403-45c6-8796-ac3ef710b3e3
After entering a Client ID, click [Add application].
Part C. Collect information for RC authentication configuration.
Collect all the information required to perform the configuration of external authentication in Resource Central which is detailed below.
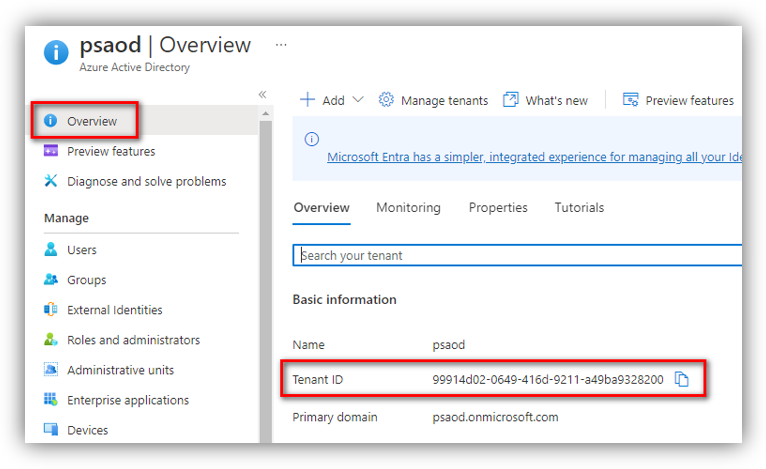
Tenant (Tenant ID)
Go to Azure portal ➔ Azure Active Directory, click [Overview] and you can see the tenant ID as shown in the following figure:
Client ID
Go to Azure portal Azure Active Directory ➔ App registrations. Click [All applications] then select the app that you registered in Part A to see its details.
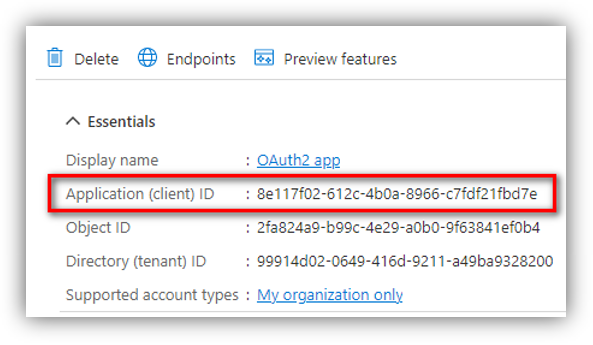
The Client ID is the Application (client) ID as you can see in the above figure.
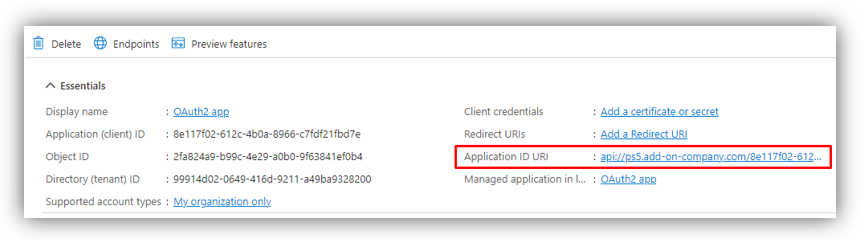
Application ID URI
To get Application ID URI, click [Overview] to see the app’s details. You can now copy the new value in ‘Application ID URI’ field:
Client secret
Retrieve the “Value” from the Client secret.
Properties
Applies to: RC 4.3+
Reference: TFS #339238
Knowledge base ID: 0318
Last updated: Jun 13, 2023
Anh Bach Duy
Comments